Four Reasons to Get Excited About the Portland Fermentation Festival
Liz Crain is excited about rot. The local writer, whose new edition of the Food Lover’s Guide to Portland just hit bookshelves, is a cofounder of the Portland Fermentation Fest, a fascinating bonanza of sour pickles, kefir, kraut, sourdough starters, cured meats, and whatever else she and other locals are brave enough to stick in glass jars and let ferment awhile.
Last year, Crain cowrote the Toro Bravo cookbook with chef John Gorham.
Here are a handful of Crain's favorite ferments to get you pumped for the festival:
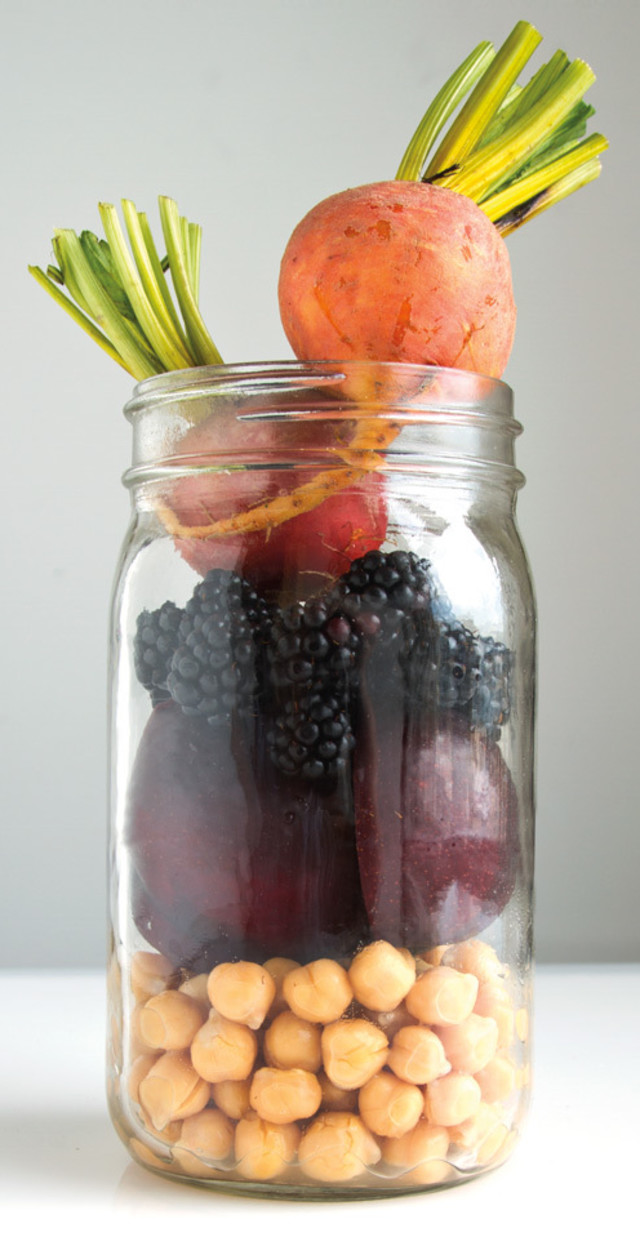
Oregon Brineworks Pickled* Beets: Crain was blown away by the Hood River company’s sweet, salty, tangy beets—shredded and laced with caraway and rosemary—at last year’s Fermentation Festival. “They go super well with eggs in the morning, in sandwiches, or in stews and braises,” she says. “Plus, take the viscous, pungent brine that’s left over in the jar, add water, and you’ve got the fermented drink kvass!”
*Pickling and fermenting are two distinct ways to preserve food. Pickling introduces acid to a food in the form of a vinegary brine. It’s a quicker process than fermentation, which invites live, airborne organisms to help a food break down and produce its own lactic acid over days or weeks—developing strong, delicious flavors in the process.
Reverend Nat’s Mora Spanish Blackberry Cider: A musty, yeasty Spanish sidra-style cider made with blackberry juice that’s been fermented for three months. “It’s so funky tasting—bright purple with that tart and jammy berry flavor,” Crain says. “I can never get enough of it.”
Jorinji Chickpea Miso: Crain hails Portlander Ernest Migaki’s fermented pastes as “the best in town”—they even inspired her to make her own miso. “The chickpea miso is sweeter, lighter, and more nuanced than your standard soybean miso,” she says. “It works really well in stir-fries and dressings.”
Liz’s Plum Wine:“I planted a tiny Brooks plum tree in my front yard eight years ago, and it now produces enough plums to make 100 bottles of wine,” she says proudly, noting that her utility room is currently crammed with food-grade buckets and carboys. “It’s an off-dry, country wine made with Champagne yeast. It’s light, simple, and tastes just like the fruit that made it—nothing more or less.”
Curious? Try your hand at Crain’s recipe for fermented fruit wine:
LIZ CRAIN’S PLUM WINE
Adapted from Sandor Ellix Katz’s book Wild Fermentation: The Flavor, Nutrition, and Craft of Live-Culture Foods (Chelsea Green, 200 pages, $25). This recipe calls for a 5-gallon carboy but can be scaled for any amount of wine with the same fruit-water-sugar-yeast ratio.
3-4 gallons worth of plums
4 gallons water + 3 quarts water, divided
1 packet champagne yeast
7 pounds cane sugar (use another natural sweetener like agave or honey if you like)
Food grade buckets or large crock
5 gallon carboy with airlock or balloon
Funnel
1. Rinse your plums and then divide them into a couple food-grade buckets or a large crock.
2. Bring 4 gallons of water to a boil and then pour half of it into each bucket over the fruit. Cover the buckets with towels and leave them overnight to steep and cool.
3. In the morning, remove 1/2 cup of the liquid from each bucket, dissolve the packet of yeast in it and let stand for a few minutes, until it appears bubbly and active. (If it does not activate don't use it and try another yeast packet.) Divide the yeast slurry between the two buckets, stir and cover again with the towels.
4. Ferment for 2 to 3 days, stirring often, at least 3 to 5 times a day. No additional sugar has been added yet. The yeast should feed on the sugar of the plums first before you give it more to feed on. During this period the mix will get somewhat frothy, but not as active as it will when the sugar is added.
5. Add sugar or other sweetener. Pour sugar into a large pot over medium heat, add the 3 quarts of water to liquefy it and stir constantly until the sugar dissolves and becomes a simple syrup. Cover, let cool and then add it to the fruit mix.
6. Ferment for 3 to 5 days, covered, stirring often.
7. Once the vigorous bubbling begins to slow, strain the wine (I use mesh nylon bags for this; they’re available at most homebrew shops in all different sizes) into a clean food grade bucket and then funnel it into a 5-gallon carboy. You want to leave a few inches of headroom at the top of the carboy for foam. Insert an airlock or fasten a balloon to the top of the carboy.
8. Store the carboy at room temperature for the first month. At first, place it in a large pan to contain the mess in case it gets so frothy that it overflows. If this happens, temporarily remove the airlock and clean it and the mouth of the carboy. Fermentation will slow gradually.
9. Test the sugar content by removing the airlock and sprinkling 2 tablespoons of sugar onto the surface of the wine. If it doesn’t react dramatically as it sinks, with bubbles and agitation, the sugar content is right. If it does, add 1 cup more of sugar and ferment another few days before repeating the test. Add just 1 cup of sugar at a time and no more than 4 cups total.
10. After 2 months, siphon the wine into a clean carboy, leaving the sediment behind. Insert an airlock/balloon and move the carboy to a cool, dark location. Ferment there for at least 9 months. Periodically check to make sure the water hasn’t evaporated out of the airlock, and refill and clean the airlock as necessary.
11. After 9-10 months bottle and enjoy.