Pretty Shady Character

Photos are meant to be seen. But for most of us, it’s a chore just to get our images off the digital camera and into print form, much less make the leap to frames and albums. Luckily, merging digital technology with old-school materials can simplify the process. And everyone has a lampshade in need of repair. So show off your photos and perk up a boring necessity at the same time.
One option is to make a lampshade out of slides. If you’re like a lot of art-students-turned-professionals, you probably have a thousand slides in your closet and nothing to do with them. With just a weekend and some motivation, you can create a unique fixture for your home.
If you’re part of the “post-slide” generation, however, we have another option for you: Wrap a translucent, panoramic print around a simple frosted-glass shade. Favorite family photos work great, but you could also hike up to the roof of a high-rise and shoot a panorama of Portland’s skyline and bridges. Or, using digital technology, stitch together separate photos from your winter ski trip or summer outing to the coast.
Both of these projects will give a much-needed face-lift to standard lamps while shining a light on memories that would otherwise just sit in a box. And best of all, they’re easy for both crafting professionals and aspiring creatives.
{page break}
Option 1: Slide Rules
Phoebe Owens, a Portland crafter and graduate student in library science, makes lampshades out of leftover film slides (she had about 4,500 sitting in her closet). She sells the projects at Breeze Block Gallery (1011 NE Alberta St, breezeblockgallery.com) and in her Etsy shop (phoebe1.etsy.com). But Owens is willing to share some tricks of the trade if you want to take a stab at making your own.
Materials:
– Your personal collection of slides. Or try Goodwill, eBay or Rerun at 707 NE Fremont St for others.
– Diffusion gel from a photo supply store (Try Pacific Grip and Lighting, 6550 NE Portland Hwy)
– 6 mm or 9 mm jump rings from a jewelry supply store (Let It Bead is a good source, 1430 NW 23rd Ave; or a craft supply store like Michaels)
– Lampshade that is as wide at the top as it is at the bottom. Since you’re going to be removing the fabric, try finding one at Goodwill.
– Lamp with a pull chain or a switch at the cord
– Permanent glue stick
– Needle-nose pliers
– Drill with a 1/16-inch bit
{page break}
How-to:
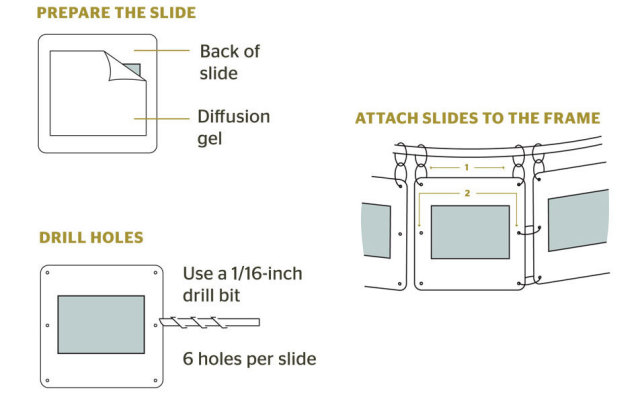
First, remove the fabric from your shade, leaving just the metal frame. Gather all your slides together, choosing which ones you’ll use for the project. Keep the same color palette, the same theme, or pick randomly. Then determine how many slides you need for your shade. Fifty slides will make a nice lamp (10 across, 5 down) but it depends on how large your frame is.
Next, clean the slides to remove any residue. Cut the diffusion gel into 1.5-by-1.5-inch squares. With a permanent glue stick, glue the gel to the back of each slide, covering the image (but don’t let the glue touch the actual slide; see above).
Then place a heavy book on the slides overnight to be sure the gel sticks. (The diffusion gel filters the light through the slides and makes for a more finished look.)
Once the glue is dry, use a 1/16-inch drill bit to drill holes in all four corners of every slide, plus two more on each side, about 1/8 inch from the edges. You’ll have six holes total in each slide (see above). Be sure the holes are in the same location on each one so that the final project looks uniform. (Owens’s tip: Drill all six holes into one slide, making a template. Then, with a mechanical pencil, mark the other slides through the holes in the first slide so you can see where to drill.)
Finally, start hanging your slides. Owens first attaches jump rings on the top rung of the lamp’s frame. Then she attaches jump rings to the first row of slides and connects the two (see above). Be sure to twist the jump rings open (two pairs of pliers is handy for this). Don’t pull them open and push them closed, or they’ll snap. To finish, attach jump rings to the rest of the slides and hang them across the top of the frame first, then work your way down.
Be creative:
Try these directions using playing cards, transparencies, colored acrylic, photo negatives, game tiles (like Scrabble) or paint sample cards.
{page break}
Option 2: Panoramic Vision
A great panoramic photo wraps well around a lampshade. There are some great premade shades at noodlEonline.com, but here’s how to make your own.
Materials:
– A frosted-glass lampshade (we found ours at IKEA for $20)
– Paper to make a template
– Computer editing program (Canon’s PhotoStitch software is a good choice)
– Inkjet printer
– 11×17 transparency film (we recommend Inkpress Transparency, 4 mil Resin Based Inkjet Film, 11×17, $35, amazon.com)
– X-acto knife
– Archival, clear, double-sided tape, Try Vyco Double Sided Tape, $3.95 at Utrecht (1122 NW Everett St, utrechtart.com)
– Bias tape from a craft supply store like Michaels
How-to:
First, measure your lampshade. A perfectly cylindrical or drum-shaped frosted-glass shade would be the easiest choice for this project; the cone-shaped shade shown can be a more difficult fit.
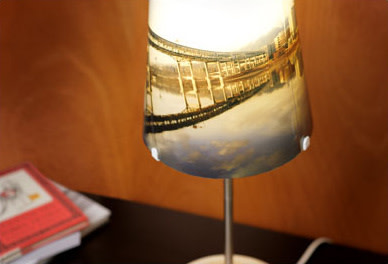
Wrap a plain piece of paper around the shade, cut it to fit and measure the circumference and height of the template. Next, crop your photograph on a computer editing program so it equals the template’s dimensions. If you don’t have a panoramic photo, some computer editing programs (like PhotoStitch) will stitch together separate photos into one panoramic shot.
Using an inkjet printer, print the landscape image onto 11-by-17-inch transparency film. Check your computer and printer for a transparency setting, and follow the film’s specific instructions on density and quality.
Once your transparency is fully dry, trace your template onto the image and cut it out using an X-acto knife. Then use strong, archival, double-sided tape to attach the photo to the outside of the frosted-glass lampshade. Optional: For a finished look, run bias tape along the top and bottom of the shade.
Tips:
– Get a shade shaped like a cylinder. It will be easier to attach your photo without distortion.
– If you’re mounting to a cloth shade, make sure the it is smooth and almost translucent.
{page break}
The Best Bulbs
If you think buying a bulb is simple, stop by Sunlan Lighting (3901 N Mississippi Ave) and prepare to be proven wrong. It’s Portland’s best—and most fun—lightbulb shop.
Here are some basic lightbulb tips for handmade shades from owner Kay Newell:
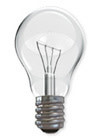
Incandescent
Traditional incandescent bulbs have the warmest light, but if you go this route, stay below 40 watts with homemade shades. The bulbs’ filaments (which produce the light) can heat up enough to melt the glue and diffusion gel, plus the UV will fade your images. These bulbs are quickly becoming obsolete because they’re so energy-inefficient. But they are the cheapest.
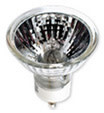
Halogen
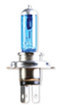
Halogen bulbs produce a much cooler, starker light than incandescent bulbs. They last about three times as long as incandescent bulbs and emit less heat, but they are more expensive, and Newell warns that the high UV level can fade paper or fabric.
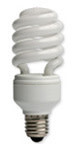
Compact Fluorescent
CFLs use less wattage to produce more light and expend between 60 to 70 percent less energy than incandescent bulbs. They can last up to 10 to 15 times longer, as well. (CFLs do contain mercury, though, so be sure to dispose of them properly. Visit epa.gov/bulbrecycling to find centers in the Northwest.) Newell warns that they still produce UV rays, so they will fade your shades. She also recommends paying attention to the Kelvin rating: 2700 Kelvin will look like a standard bulb; 4100K will be a cooler light; and 6500K will produce light similar to daylight.
Xenon
Newell says your best bet with homemade shades is to use Xenon bulbs, which create a pure white light and produce no UV, so they won’t fade your materials. Plus, they last longer and burn cooler than halogen and incandescent bulbs. Sunlan carries them in sizes ranging from 3 to 13 inches tall.