Playing With Mud
In the Neolithic period, inhabitants of the Greek island of Crete coated their walls with clay plaster, a finish with a malleable texture that was ideal for carving decorative relief designs. Beginning as early as 900 A.D., the ancient Pueblo people of the American Southwest slathered the exterior walls of their dwellings with adobe (sun-dried clay) to protect them from moisture, fire, and pests. Praised for its rich tones, the way it warmly reflects light, and its ability to absorb and release humidity, clay plaster has been used to finish walls across the globe for centuries. Today, thanks in part to its beauty and malleability, the finish is embraced as a sustainable alternative to standard paint.
Traditionally, the components of clay plaster are clay, sand, water, and fiber. Over time, additional additives like wheat-flour paste, manure, cactus juice, and casein were added to make it more durable and workable. Unlike most paints, clay plaster has a low environmental impact: It is nontoxic, contains no volatile organic compounds, and it isn’t heated to high temperatures in production. When applied properly, it is also mold-resistant, breathable, and as Noel Adams of Traditional Natural Plaster Company (www.traditionalplaster.com) in Portland has seen time and time again, fairly easy to repair. “My son loves to bang the rocking chair against the wall and create dents,” he says. “In minutes I can just re-wet it and re-trowel it and the damage is gone.” The son of a traditional plasterer, Adams discovered earthen plasters (which include clay, gypsum, and lime) in 2003, and he has since applied a variety of recipes to the walls of over a hundred homes around Portland. What follows is Adams’s simplest technique for the novice plasterer.
{page break}
Trowel On
As long as you plan ahead and gather the right materials, coating your walls with clay plaster will be an easy and satisfying weekend project. Here are the tools and techniques you’ll need:
Materials:
- 150-grit wet/dry sandpaper
- fiberglass joint tape
- all-purpose joint compound
- putty knife
- drop cloth
- painter’s tape
- rigid steel rectangular plaster trowel
- plaster hawk
- roller brush
- small paintbrush
- paint tray, stir stick
- particulate face mask
- heavy-duty ½-inch drill
- attachable mixing paddle
- 5-gallon bucket
- Chapin Multi-Purpose Sprayer
- tile sponge
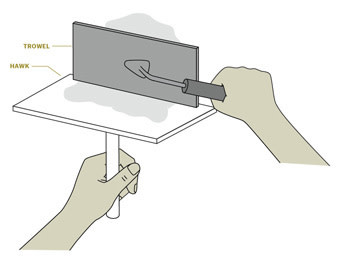
Master the Tools
The traditional plastering tools may sound intimidating, but they just take practice to master. Hold about 1 cup of plaster on the hawk and scoop half of it onto the trowel with your dominant plastering hand.
Know Your Site
Each work site has its own preparation and application requirements, depending on the existing wall surface. These steps are for plastering over a painted wall. But before you get started, consider whether you have lead paint. If your room hasn’t been painted since before 1978, it just might. Adams says a good gauge is to check whether the paint is flaking; if it is, it probably contains lead. In that case, have professionals like Global Pacific Environmental (503-223-4401) test and remove it.
If your wall is covered in glossy paint, sand it lightly with 150-grit sandpaper to give it tooth. For all paint finishes, cover any cracks from ¼ inch to 1 inch wide with fiberglass joint tape. Next, seal these cracks and any small depressions with joint compound, using a putty knife to apply the compound so that it’s flush with the wall. Let it dry completely.
Before you begin priming and plastering, protect the floors and adjacent furniture with a drop cloth, set up a fan for ventilation, clean all dirt or grease off the wall, and apply painter’s tape around the trim and ceiling seams to protect them.
Prime Time
Traditional earthen plasters required a layer of chicken wire or burlap underneath to create a textured surface to which the plaster would bind. To most modern plasterers, this is a recipe for an unrefined, caveman effect. Fortunately, there’s an alternative: Ecohaus (819 SE Taylor St, www.environmentalhomecenter.com) carries American Clay’s Sanded Primer Elite, which creates an ideal surface for the plaster to bind to. It goes on like a coat of thin paint and should be applied with the shortest-haired roller brush you can find. Be sure to stir the primer well, until it has the consistency of paint and the sand is mixed throughout. First use a smaller brush for cutting in at the corners and along the trim, then pour the primer into a roller pan and use the roller brush to apply an even coat to the wall. Allow 3 hours for it to dry completely.
{page break}
Stir the Mud
A 50-pound bag of American Clay’s Loma plaster (also sold at Ecohaus) yields one coat per 200 square feet, so measure your space to determine how many bags you’ll need. Pigments, which are sold separately, are available in a palette of 43 colors, from clean blues and grays to earthy reds and golds. You can also special order a custom hue or even enhance the pigment’s depth and luster by adding mica chips, shredded straw, or recycled colored glass.
For the best results, mix your plaster 4 to 8 hours prior to application. Before you get started, pick up a particulate mask (inhaling clay dust is hazardous to your lungs), rent a heavy-duty low-speed ½-inch drill ($12 per day at Home Depot, www.homedepot.com), buy an attachable mixing paddle and a 5-gallon bucket, and lug it all into the garage to avoid any catastrophic spills. Follow the directions on the Loma package for blending the plaster and the pigment (for more detailed instructions and techniques, visit American Clay’s website at www.americanclay.com). Keep the drill on a low speed to avoid creating air pockets. When it’s ready, the plaster should have the consistency of a thick milkshake, with the pigment spread throughout. (If the plaster dries out between mixing and applying, just add water to return it to the right consistency.)
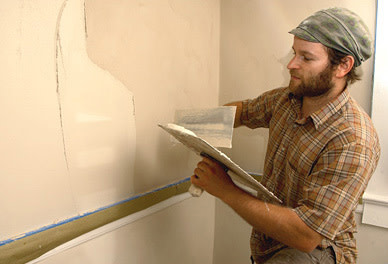
Apply the Plaster
The technique here is all in the position of your trowel. Hold it at a 30-degree angle to the wall and sweep upward, reducing the trowel’s angle slightly as you go but maintaining consistent pressure.
The Hawk and Trowel
No, it’s not a pub in London. These are the traditional plastering tools you’ll need to spread your two coats of clay. The hawk looks like a tray resting on a handle, and the best trowel for this project will be a rectangular one made of rigid steel.
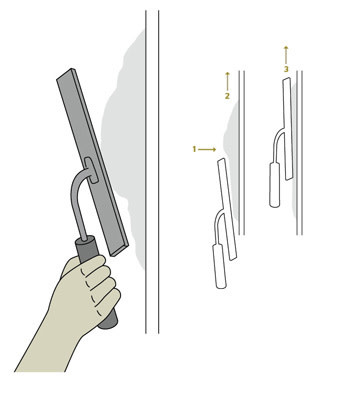
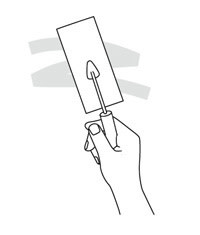
Hold the hawk in your nondominant hand, keeping the tray level, and pour about 1 cup of plaster onto it. Scoop half of that onto the trowel’s flat surface. Starting at the floor, hold the trowel at a 30-degree angle to the wall, with the bottom edge against the wall, and apply pressure while sweeping upward, keeping your trowel angled. Unless you’ve plastered before, your instinct will be to immediately flatten the trowel against the wall—this is an excellent way to create thick, clumpy layers, so resist it. Another challenge for first-timers, says Adams, is to avoid putting the plaster on too thick, which causes it to crack as it dries—so it’s important to watch your trowel’s angle and maintain consistent pressure until you have a smooth, thin coat (about 1/16 inch thick is best for the base coat). If ridges, clumps, or rough spots remain (and they likely will), smooth them by scraping the trowel clean against the hawk and using the trowel’s edge to sweep horizontally across the plaster you just applied.
{page break}
Always add new plaster next to a section with a wet edge to avoid creating the dreaded “cold seam”—a hardened ridge that can show through the top layer. So if you’re breaking up the project over many hours or days, be sure to finish a complete wall in each session. Allow the bottom coat to dry completely (drying time will generally be between 4 and 8 hours) before repeating these steps for the second coat. This time around, you have the opportunity to show off how far you’ve come with your technique by layering the top coat on just 1/32 inch thick.
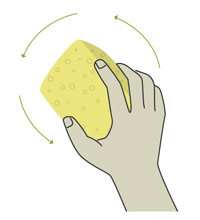
Buff the Surface
For a soft, matte surface, burnish your wall with a damp tile sponge, rubbing lightly in a circular motion. For a hard, polished surface, opt for a trowel finish, applying pressure on the trailing edge of the trowel as you sweep it across the wall.
Finishing Touch
The most basic way to burnish plaster is with a sanded finish, which requires only a thin coat of water and a tile sponge. Burnish when the top coat of plaster is still damp, but dry enough so that slight pressure with your thumb doesn’t mar it. Use a sprayer to lightly mist the wall, and rub the wet area in a circular motion with an almost-dry tile sponge, using light pressure to compress all the layers. Remove the painter’s tape when the plaster is still damp. After the wall has dried completely, wring out your tile sponge and wipe the wall in broad, overlapping arcs to remove excess sand.
There are infinite combinations of clay plaster recipes, pigments, and techniques to discover. So don’t be afraid to investigate and experiment. Regardless of how you choose to play with your mud, clay plaster gives your home a warm and sophisticated wall finish that will satisfy both the child and the adult in you.