Summer Blaze
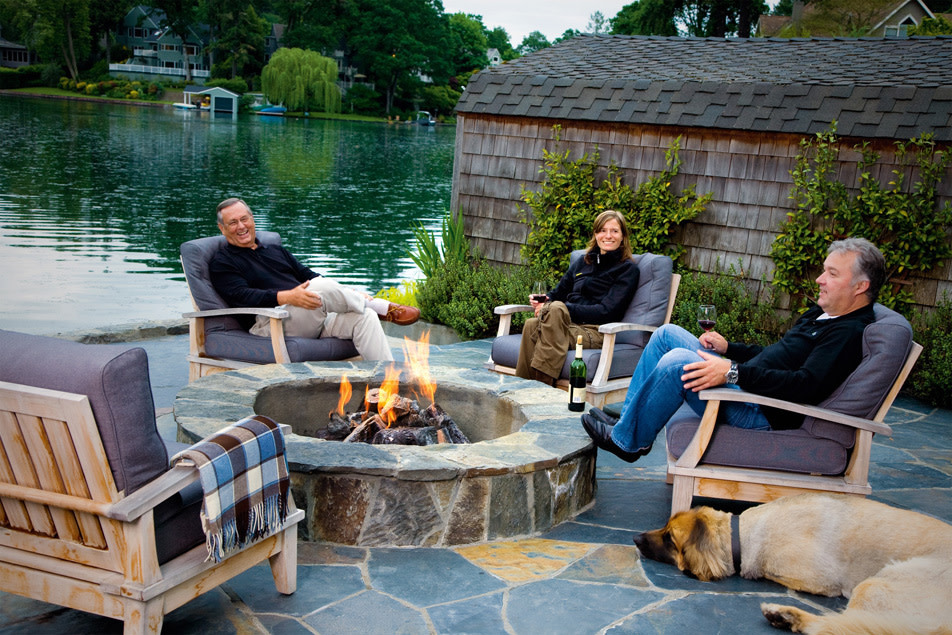
Image: Steven Scardina
Nothing induces the same primordial trance as fire. It warms our bodies, cooks our food, even scares us. It also adds some great ambiance to any gathering on a cool summer evening in Portland. Whether you want to relax with friends and a shaken martini in the cozy glow of the flames, or get back to cooking with this most basic of methods, a backyard fire pit will enhance any occasion.
The easiest, most convivial of outdoor fireplaces is the simple stone pit, according to Kevin Roberts, owner of Big Sky Landscaping (503-257-9275, bigskylandscaping.com), an Oregon City company that has built dozens of fire pits in the area. You can seat more people around a fire pit than around an outdoor fireplace, and you have the option of adding a cooking grate to accommodate everything from an elaborate meal for a sophisticated backyard soirée to some simple hot dogs and s’mores for a kids’ camping party.
If you have some elbow grease to spare, you can be hosting a roast beside a fire pit you built yourself in no time. Here’s the basic how-to from Roberts.
{page break}
Pick a Spot
According to Portland Fire and Rescue regulations, your fire pit needs to be at least 15 feet from a structure or combustible material. As long as you’re in compliance with fire codes, where you decide to build the pit is up to you. Just make sure that you’re maximizing your space for entertaining.
Materials
Shovel
Tape measure
Stake (anything round)
String or twine
Nail
Level
¾-minus crushed gravel from S & H Logging Co (20200 SW Stafford Rd, Tualatin, 503-638-1011), $35/yard
Stones or brick of your choosing (Roberts recommends smaller stones: 4 to 10 inches long 2 to 5 inches wide by 1 to 5 inches deep). Try Heritage Rock (15903 S Park Place Ct, Oregon City, heritagerockllc.com).
Quikrete Mason Mix Type S mortar from Home Depot (multiple locations, homedepot.com), $4.97/bag
Cement trowel
Grate from Hot Spot Fireplace & BBQ Shop (11525 SW Canyon Rd, Beaverton, 503-626-4652), $70-$150
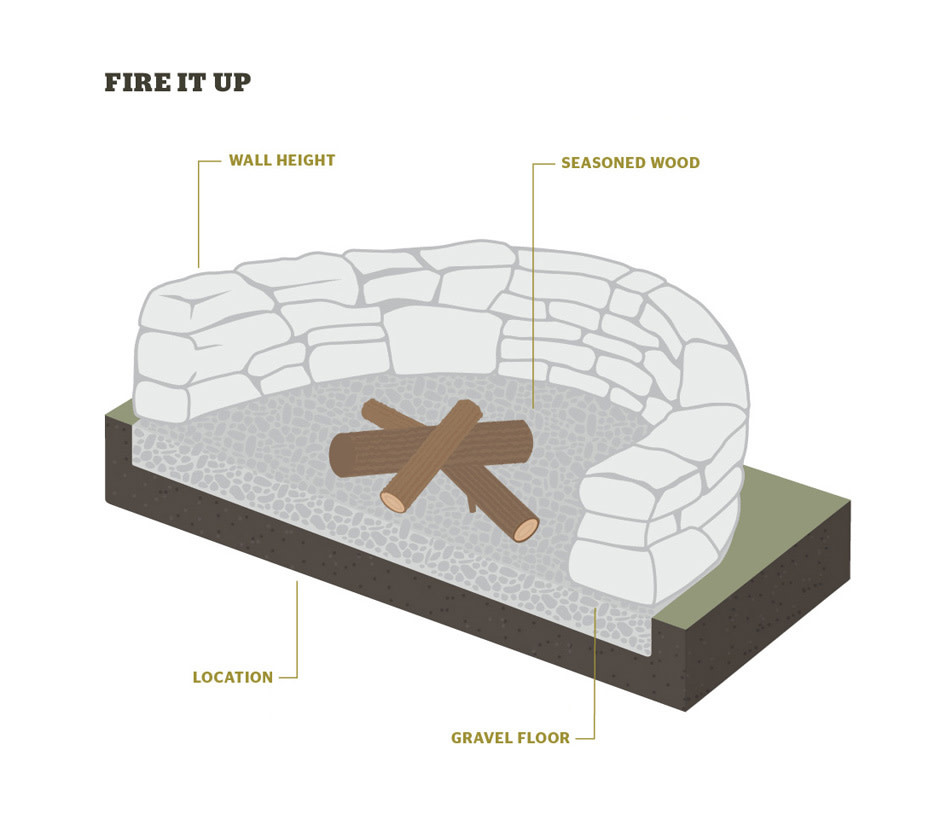
Lay the Groundwork
To mark out the area where you’re going to dig, drive a round stake or similar marker into the ground where you want the center of the pit. Tie a sturdy piece of string or twine to the stake, then tie a nail to the other end of the string, 18 inches from the center stake. Using the stake as a pivot point and the string as a guide, draw a circle in the lawn with the sharp end of the nail. An 18-inch radius will produce a fire pit with a 3-foot diameter, but you can make your pit a little larger if desired.
Flickering flames will add a welcome glow to all your outdoor gatherings this summer party season.
Next, you’ll need to prepare the floor of the pit. The height will be determined by the amount of rock you use in the walls, so you don’t have to dig a deep hole for the fire pit to be efficient. Roberts suggests digging just enough to clear out any grass, leaving a flat patch of dirt that will be the bottom of your pit. Pour a 2-inch-thick layer of gravel onto the dirt floor; the gravel will function as a drain to keep your fire pit from turning into a pond once the rain inevitably returns.
{page break}
Build the Walls
Both small stones and bricks work well for this type of fire pit. The difference is primarily aesthetic, so choose whichever you like better. Roberts does note that using smaller stones makes curving the wall easier. You’ll need about 1.5 cubic yards of stone for a 2-foot-high pit. But make sure you buy a little extra so you’re not stuck making another trip to the store.
When you’re ready to lay the stones, mix Type S mortar with water. You can test if your mortar is mixed properly by smearing some on the side of a stone or brick. If the mixture sticks, you’re ready to go. If it runs down the side, it’s too wet and you need to add more mortar. If it clumps and falls off, it’s too dry and needs more water. You’ll want to mix about one-quarter of a bag at a time so it doesn’t dry out.
Start at the bottom and work your way up. Place the first stone at the edge of the hole, then put ½ to 1 inch of mortar on the side of the stone and place the second stone so that it touches the first. Continue until you have a full circle. For the next layer of stones, do the same, but put mortar on the bottoms of the stones as well as the sides, so that each stone is attached to the others. Roberts says the key to laying stones is to offset the layers so the seams of your stones do not line up. Continue stacking until your wall is 12 to 18 inches high if you intend to use it solely for warmth and atmosphere. But if you want your fire pit to double as an outdoor grill, your wall should be 2 feet tall for optimal cooking conditions.
Although recreational fires are not regulated by the Oregon Department of Environmental Quality, take extra care when building your pit to ensure longevity and a safe, enjoyable experience. Visit portlandonline.com for complete backyard fire regulations.
Image: Jen Davison Wick
{page break}
Throw a Party
The finishing touch is a grill. Most stores don’t have large-enough grills in stock, but Hot Spot Fireplace & BBQ Shop in Beaverton will special-order the grate of your choice; they range in price from $70 to $150. You can set the grill right on top of your pit for cooking, then remove it for socializing and relaxing by the flames. Just make sure that you have a pretty good fire going before you start cooking. The one downside to this setup is that the grill needs to be supported on all sides, so in order to feed the fire, you’ll have to remove the grate.
Once your pit is operational, the flickering flames will add a welcome glow to all your outdoor gatherings this summer party season. And although no one can say who originally harnessed fire, you’ll certainly enjoy rediscovering its intrigue over a cocktail with your closest friends.