These Salmon-Sesame Dumplings Prove that Dumplings = Love
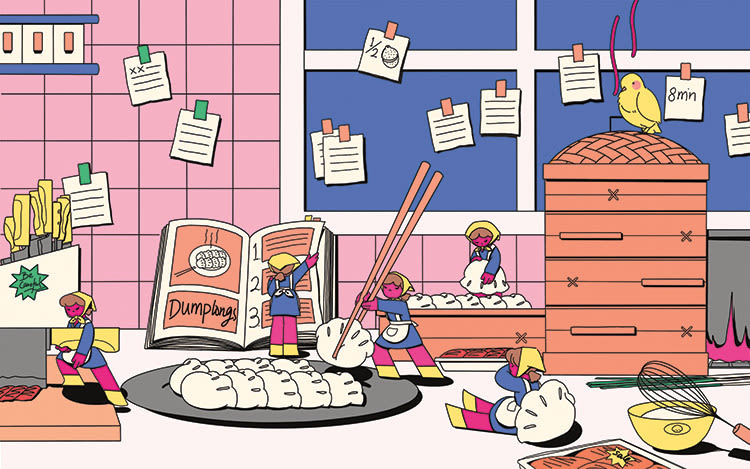
Image: SanQian
They’re warm, bite-size morsels of deliciousness. But do dumplings, the quintessential and universal comfort food, truly equal love, as Portland author Liz Crain attests in her new cookbook Dumplings = Love? I set out to find the answer by trying my hand at making them, sure I’d be a dumpling master in no time. Instead, they left me humbled and exhausted.
Backing up: My dumpling odyssey came just days after January’s attempted coup, in an effort to get my thumbs off of Twitter and into a bowl of dough. Crain’s book draws inspiration from around the world: Korean mandu, Norwegian komper, Pacific Northwest nettle–caramelized onion, and twists like the siu mai–shaped salmon-sesame dumplings I set my heart on.
As I, a novice dumpling maker, would learn, dumplings require, if not love, at least undivided attention—not a brain ruminating over the potential collapse of democracy. Making the skins alone nearly brought me to my knees—I accidentally left out two tablespoons of water, which made my dough crumbly, a dumpling disaster. Then I tried to roll it out using a drinking glass, and the dumpling skins came out comically thick. But, hey, there’s no shame in store-bought frozen dumpling skins, Crain notes, and you can be creative with your folding technique and choose your own origami adventure. Once I resorted to folding the trusty wonton shapes my grandma had taught me, these babies were restaurant quality. My recommendation: be kind to yourself and start with store-bought skins.
When I finally sat down to my ultimately delicious dumplings, the whole “dumplings equal love” equation took on new meaning. I honestly would only make dumplings for people I love. Really, really love. It’s not that they require hard-to-find ingredients or complicated cooking techniques, but they take patience at first. Don’t expect grandma-level dumplings on your first try—after all, grandmas have decades of practice. Whether they’re made by family, friends, my local restaurant, or especially myself, I’ll never take a handmade dumpling for granted again.
Salmon Sesame Dumplings
Makes 4½–5 cups of filling for 50–60 dumplings
- 1½ lbs turmeric all-purpose egg dough*, or 60 store-bought dumpling skins
- 2 lbs salmon, skinned (see note) and chopped into 2- to 3-inch pieces
- ¼ cup freshly squeezed lemon juice (from about one medium lemon)
- 2 tbsp soy sauce
- 2 tbsp Shaoxing wine, sake, or dry sherry
- 2 egg whites
- 3 tbsp peanut oil
- 3 tbsp toasted sesame oil
- ¾ to 1½ tsp kosher salt
- ¼ to ½ tsp freshly ground black pepper
- 2 cups thinly sliced garlic chives (or 10–12 thinly sliced scallions, both white and green parts, plus 2 minced or pressed garlic cloves)
- 2 tbsp finely grated or minced peeled fresh ginger
- 1 tbsp rinsed, minced preserved lemon (about 1 lemon quarter), pith removed and discarded, or 3 tbsp finely grated fresh lemon zest
NOTE: Salmon skin is tricky to remove, so sometimes I’ll ask the fishmonger to do it for me. I really like salmon skin baked or fried, so I always ask them to include it in my package.
1. Prepare the dough according to instructions, or set out the store-bought skins.
In the bowl of a food processor, combine the salmon, lemon juice, soy sauce, and wine, and pulse 10–15 times, until the fish is roughly chopped. Use a spatula to scrape the sides of the bowl. (Or mince the salmon by hand into a chunky paste and proceed with a spoon.)
Add the egg whites, oils, and salt and pepper to taste, and pulse 15–20 times, until it’s fairly puréed.
Transfer the filling to a large bowl and fold in the chives, ginger, and preserved lemon until evenly distributed.
Cover and refrigerate for at least 30 minutes before using.
2. Form the dumplings:
If using store-bought skins, moisten the perimeter of several at once, before filling, by dipping your index finger in water, 2–3 times per skin, and tracing it along the inside 1/2- to 1-inch perimeter of the dumpling skin. This makes it easier to form the tops of the dumplings without any cracking. If you use homemade skins, skip this step, since they should be plenty moist and pliable.
Lay a dumpling skin in your nondominant hand, over the upper part of your palm and your fingers, and use a butter knife, flat bamboo spreader, or shallow spoon to place a scant to heaping tablespoon of filling in the center of the skin. Gather the skin up around the filling so that it naturally pleats. (Expert dumpling formers will purposely fold and articulate each pleat.)
With one hand, cinch the open top of the dumpling by making a circle with your thumb and index finger, while forming the dumpling and pressing the bottom of it with the palm or fingers of your other hand. This creates a fairly flat base so that the dumpling sits up in the steamer.
Garnish the top of the filling before or after steaming, if desired.
3. Steam the dumplings:
Fill a steaming pot a quarter to half full with water, allowing 3–5 inches between the water and the steamer, and bring to a boil over high heat.
Lightly oil the steamer, or place perforated parchment paper, cheesecloth, or thin cabbage leaves in it. Situate the dumplings inside, leaving ½ to 1 inch between each dumpling. I recommend steaming no more than three stacked tiers at once.
Once the water is boiling, carefully place the steamer on the pot, and steam the dumplings for 7–8 minutes.
With oven mitts or a kitchen towel, carefully remove the steamer from the pot, and serve the dumplings directly from the steamer or transfer them with tongs to a platter. If serving directly from the steamer, set it on a plate or platter to capture drippings if you like. Remove the lid at the table for grand, steamy effect!
All-Purpose Turmeric Egg Dough
Makes about 1½ pounds of dough for 50 to 60 (3- to 4-inch) dumpling skins
- 2 large eggs
- ½ cup plus 2 tablespoons hot water (110 to 120 degrees F)
- 1 teaspoon vegetable oil
- 2 teaspoons ground turmeric
- ½ teaspoon kosher salt
- 3 to 3¼ cups (425 to 475 grams) all-purpose flour, plus more for dusting
CHOOSE YOUR OWN KNEADING AND FORMING ADVENTURE
- In a medium bowl, whisk the eggs, water, oil, and salt for 1 to 2 minutes, until the eggs become slightly frothy.
- In another medium bowl, whisk 3 cups of the flour to break up any clumps. Whisk in the turmeric. Make a small well in the center of the flour, and slowly blend in the egg mixture. I like to use chopsticks for this; a wooden spoon works too. Mix the dough together until it forms a shaggy mass.
- Knead the dough for about 3 minutes in the bowl. Put the shaggy bits from around the bottom and edges of the bowl into the middle of the dough, and close it around them. If the dough seems stiff, wet your hands with water and knead it until it becomes more elastic. If it is too wet and sticking to your hands, add flour 1 tablespoon at a time, working it into the dough.
- Lightly dust your work surface with flour, turn out the dough, and knead it for 4 to 5 more minutes, until it is smooth and elastic. Again, if the dough seems stiff, wet your hands with water and knead it until it becomes more elastic. If it is too wet and sticking, add flour to your work surface 1 tablespoon at a time, and knead it into the dough.
- Cover the dough with a slightly damp towel, and put it under the inverted mixing bowl. Rest it for 30 minutes (or up to 2 hours) before rolling it out for dumplings, or refrigerating or freezing it.
Forming Skins By Hand:
- Use your thumbs to poke a hole in the center of the dough. Gradually enlarge the hole with both hands, by moving the dough clockwise or counterclockwise, until it is about ¾ to 1 inch in diameter.
- Using a bench scraper, if you have one, or a sharp knife, slice the dough into 10 to 15 (¾- to 1-inch) pieces at a time. Roll each piece into a ball and then place it on the lightly floured work surface, making sure none are touching. Cover the balls and the remaining dough with a dry towel.
- Lightly flour the work surface again, smash a ball with your palm or a flat, heavy object (a tortilla press works), and then roll it into a 3- to 4-inch-diameter skin (about 1/16 inch thick for shumai or crescents, and 1/8 inch thick for XLB). Don’t worry if it isn’t perfectly round.
- Dust the skins with flour as you make them, and place them with minimal overlap on your lightly floured surface, covered with a dry towel. Try not to stack them, to eliminate sticking—space permitting, of course. Always keep the balled dough covered with a dry towel too so that it doesn’t dry out.
NOTE: Prepare the skins quickly and expertly, like a pro, by using your primary hand to roll them with a small dowel rolling pin while, in between rolls, twisting the skin in ½- to 1-inch increments clockwise or counterclockwise with your other hand. Flip the skin about halfway through.
Or, With a Cookie Cutter:
- Lightly dust your work surface with flour. Divide the dough into 4 equal pieces. Take 1 piece, covering the other 3 with a dry towel, and shape it by hand into a rounded rectangle about ½ inch thick. Using a rolling pin, roll it out until it is about 1/16 inch thick (or 1/8 inch thick if making XLB). Sprinkle the dough and your rolling pin with flour if the dough gets sticky.
- Using a 3- to 4-inch cookie cutter, cut out as many skins as you can, usually 10 to 12 per piece if 1/16 inch thick, and 6 to 8 if 1/8 inch thick. Collect the leftover dough, and reform and reroll it as described. I recommend rerolling two to three times, until the dough is no longer pliable.
Or, With a Pasta Roller:
- Lightly dust your work surface with flour. Divide the dough into 4 equal pieces. Take 1 piece, covering the other 3 with a dry towel, and shape it by hand into a rounded rectangle about 1/2 inch thick and no wider than your pasta roller. Dust it with flour.
- Set a hand-crank pasta machine to the widest setting (usually #1), and feed the dough through the roller. If you are using a stand-mixer attachment, set the roller to the widest setting of #1, and with the mixer on medium-low speed (#2 on a KitchenAid), feed the dough through the roller. Move up to the next thinner setting (most machines range from #1 to #6, #7, #8, or #9), and roll it through again. Do this, flouring the dough as necessary before rolling, until you have rolled it through the indicated settings, it is almost translucent, and it is about 1/16 inch thick for crescents and shumai, or 1/8 inch for XLB.
- Lay the sheet on the lightly floured work surface, and cut the sheets as detailed in step 7 of Forming Skins with a Cookie Cutter (above). (I recommend rolling, cutting, and filling in 4 separate batches so the dumpling dough does not dry out as it waits to be filled.) Once you’ve filled the dumplings, either cook, refrigerate, or freeze them.
- Each sheet should give you about 10 to 12 (3- to 4-inch) skins in the first cutting if 1/16 inch thick, or 6 to 8 skins if 1/8 inch thick.
- Collect the leftover dough, and reform and reroll it as described. I recommend rerolling two to three times, until the dough is no longer pliable.
NOTE: If the dough sheet gets large and unwieldy, set it on your lightly floured work surface, cut it in half, and proceed with 2 pieces, one at a time, through the roller.
©2020 by Liz Crain; abridged and excerpted from Dumplings = Love by permission of Sasquatch Books